Let's begin--as they say--at the beginning. As one who primarily self-identifies as an introverted computer nerd, it did not seem likely in retrospect that woodworking would end up being one of my major hobbies. Now, understand that I'm the kind of person who likes to have nice things but who also abhors spending large amounts of money. Assuming I successfully avoid the lure and seduction of criminal enterprise, that means I end up either taking advantage of the second-hand market or building things myself. So if I want a decently nice bookshelf, computer desk, or what have you without spending a dozen kilobucks to outfit my house with quality furniture, I would need a minimum of two things: 1) the knowledge of how to build things, and 2) the tools to build them with.
In days past, #1 would have been a challenge. You would have to either read books and magazines and stumble along for a long time in the dark or find yourself a mentor. However, thanks to the Internet, learning is fairly straightforward these days. You pick up your tablet off the chair of your couch, and yell at it, "Siri! How do I build a goddamn bookshelf?" A few minutes later, you know how to build a goddamn bookshelf. Over the last 15 years, it has become mind-bendingly easy to learn almost anything you want and what really fascinates me the most is that we already take this for granted.
As for the tools, you can spend an truly unlimited amount of money on building up a workshop. But if you start out small, you'll find that you really don't need all that many tools to have a fairly competent shop. As I found out from personal experience you can go a very long way with just a table saw, a miter saw, a drill, and a few miscellaneous hand tools. I've made a number of projects in this barebones workshop of mine and only with herculean effort do I manage to contain my own surprise that the end result did not turn out to be a large pile of steaming dung.
A bandsaw was not actually a tool that was even on my radar until I somehow ran across Matthias Wandel's YouTube channel. I couldn't tell you now what brought me there but I remember binge-watching all of his videos and became especially enamored with not only his handsome countenance but also his bandsaws. Right away I could see that a bandsaw offered a lot of versatility and speed and the fact that it was possible for me to build one myself sold me on the whole idea right away.
It took me a couple of years to get to a point that I was actually able to start building it. In fact, as I write this, it's been a little over a year since I started it. The whole build took around 9 months to complete in between family obligations, other hobbies, and robbing ban... I mean working for a living. I had planned on making a video of the build but the combination of my own incompetence and a smartphone that pined for the fjords meant that I lost almost all of the footage and photos that I took. The pictures in this article are mostly "scraps" that I found lying around on my hard drive or got posted to arsebook for some reason or another.
Before I jump into it, I want to thank Matthias for all of his amazing work and for making the plans for his projects available either for free or for extremely affordable prices. http://woodgears.ca/bandsaw/plans/index.html While you're there, check out the rest of his site. I guarantee you will come back amazed or amused or both.
The Motor
I agonized over what to do about the motor for quite a while. I didn't have one that was suitable and a new motor is fairly expensive (more than $100, typically). Motors are heavy and are therefore expensive to ship, so eBay was not an option. I watched craigslist for quite a while but all I kept finding was ancient crap at laughable prices. (As is the norm for most of craigslist, if we're being honest here.)
Then I finally got lucky. There's a store near where I work called The Reuse Center. They're a non-profit with a warehouse and basically they take donations of surplus building materials, tools, furniture, household items, and so on, and sell them back to the public at reasonable prices. This is where I picked up a Dayton 3/4 HP single-phase induction motor for $20. I keep the price tag on it so that future generations can marvel at my frugality and blatant smugness.
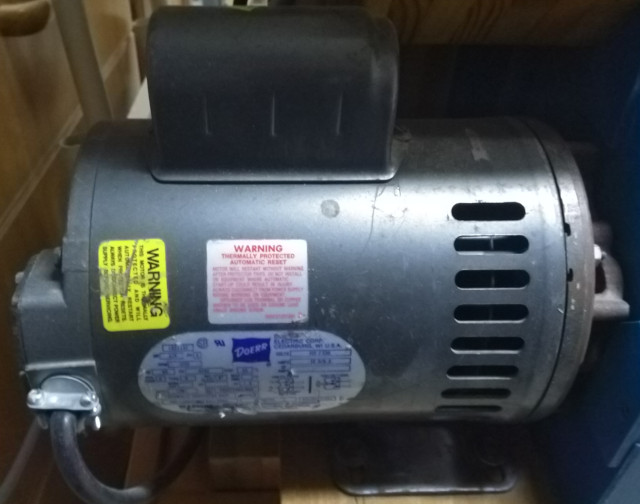
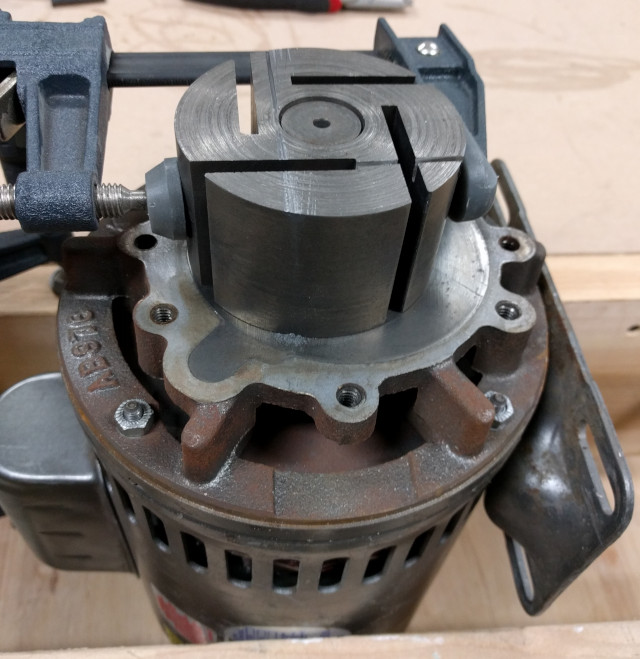
The motor was attached to a vane pump of some kind. The pump was broken but thankfully it turns out that the motor was completely fine. The vanes sat in a rotor which I couldn't figure out how to pull off. In retrospect, I probably could have made a puller for it but instead I ended up just cutting it off with a hacksaw like some hooligan. It was cast iron so it was easy to cut through anyway. The back plate covering up the electrical gubbins was missing so I fabricated another out of a random piece of plastic from the junk bin.
The Frame
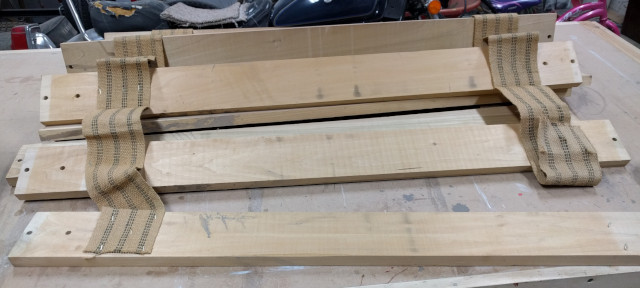
For the most part, I had planned to build the saw out of scrap or reclaimed wood, as Matthias recommends. Unfortunately, at the time I was ready to start building it most of my scrap wood was plywood, MDF, and various other wood by-products that are not suitable for the frame. I was forced to open my wallet in shame. Again at the Reuse center, I stumbled upon these bundles of rather old poplar bed slats. A few of them were too bent or crooked to use but most of them were good enough. Each bundle was $5, a price I could deal with if it meant getting a bandsaw at the end of the ordeal.
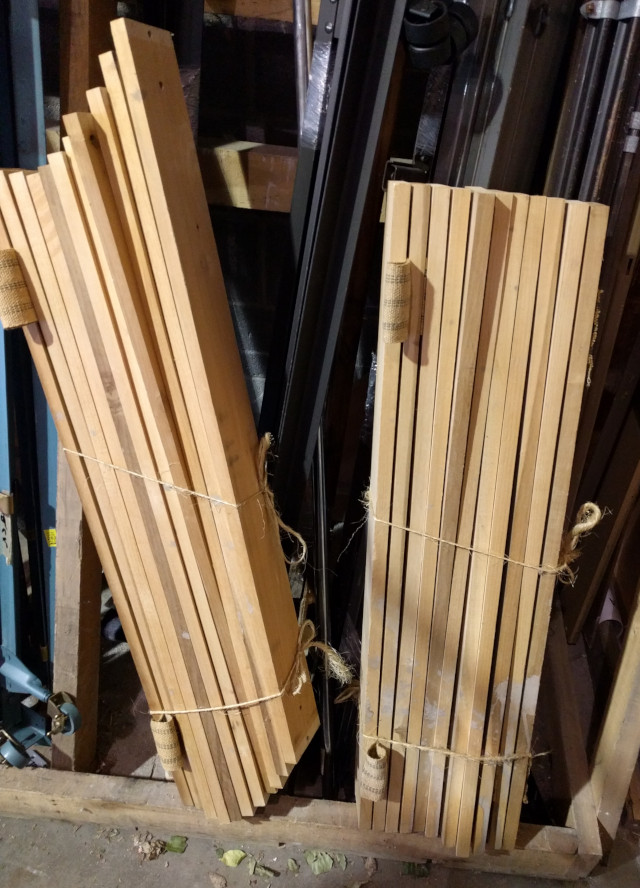
Removing all the staples from these was a tedious bag of boring.
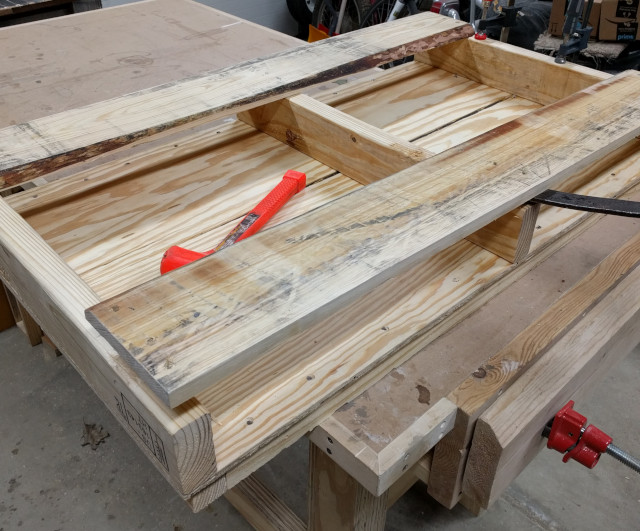
I also tried to get my wood from free pallets but kept having trouble finding pallets with any decent wood in them in the right thickness. As it turns out, they tend to make pallets out of the shittiest wood available. Who knew? Still, I managed to get a few decent boards out of this pallet and I think I even used the 2x4s for the bottom cover legs and the plywood for the bearing blocks.
I used a thickness planer to get all the boards down to the proper thickness and to take out some of the bends and other defects. I had to do lots of extra gluing and trimming to get pieces of the right width in lots of places, which means the frame is basically a semi-random mix of poplar and pine.
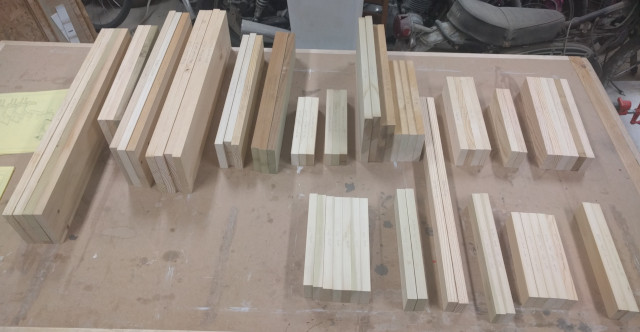
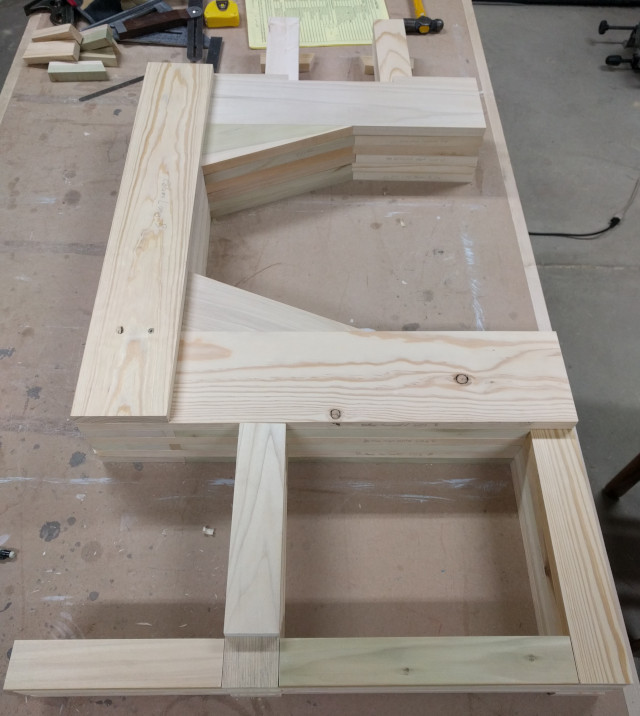
All the rectangular frame pieces cut to size:
Hey, while we're here and I have your attention, let's digress for a moment and talk about the importance of being able to trust your tools. Most measurements in the Wandsaw plans are metric. Which is fine, I have nothing against science, but I did not have a metric tape measure when I started the project. It turns out that the tape I bought reads a half a millimeter short consistently across the whole tape. I did not discover this until halfway through building the frame and some other parts when I finally looked into why my parts kept coming out slightly smaller than I was anticipating when measured against other parts or with my steel rulers. The fact that the error was consistent and relatively small meant that it didn't really make a huge difference in the overall project, just a lot of confusion and a few parts that had to be re-cut to match others. So another lesson learned: always try to verify any new measurement device that you buy if you have the means to do so.
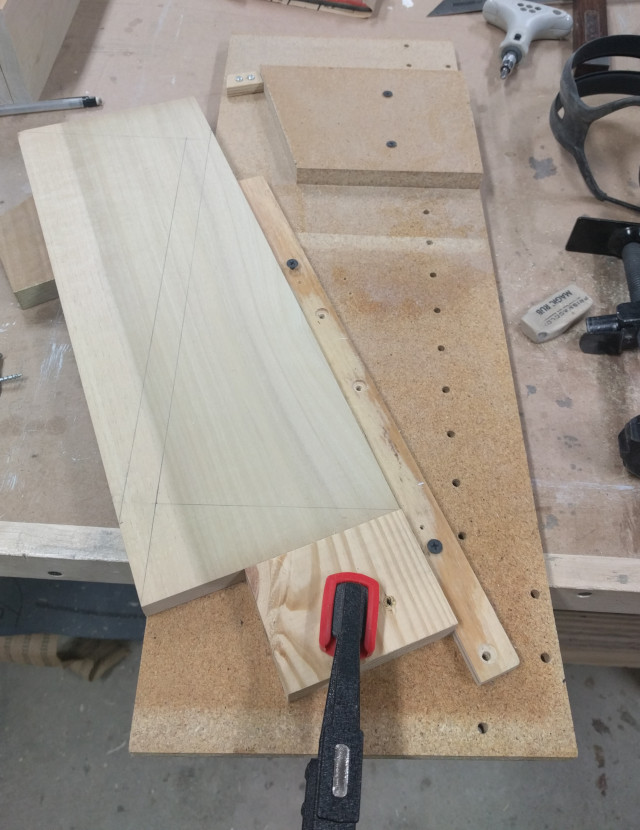
Above is my shop-made angle jig. I used this to cut the triangular pieces of the frame. When I need to cut a board on an angle, I unscrew the pieces and put them where I need them to hold the work as I run it through the table saw. The pieces at the top were from the cantilevered storage shelves I made for my garage, also a premiere Wandel design.
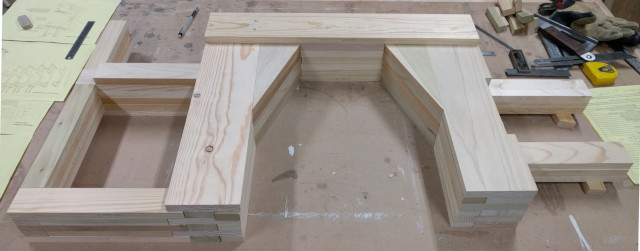
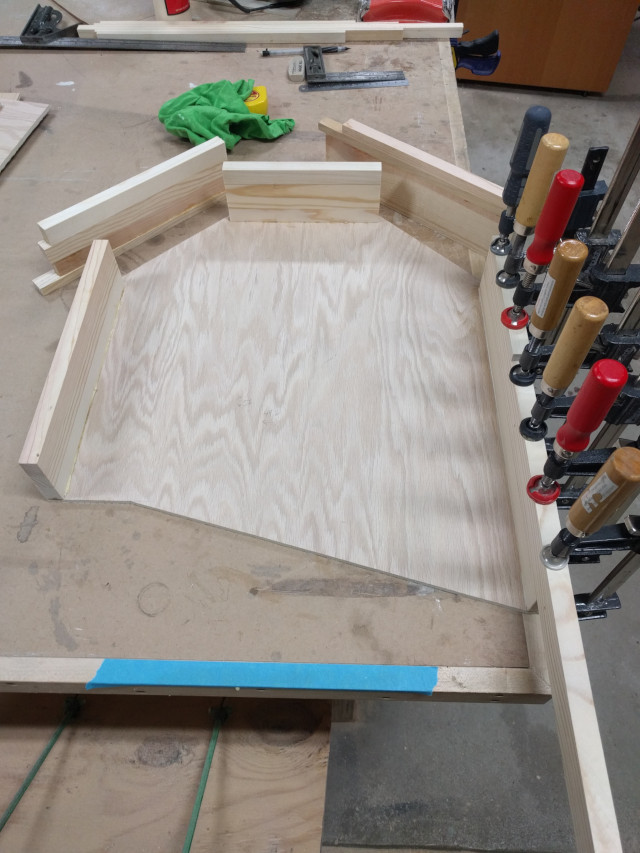
Test fitting all the frame pieces:
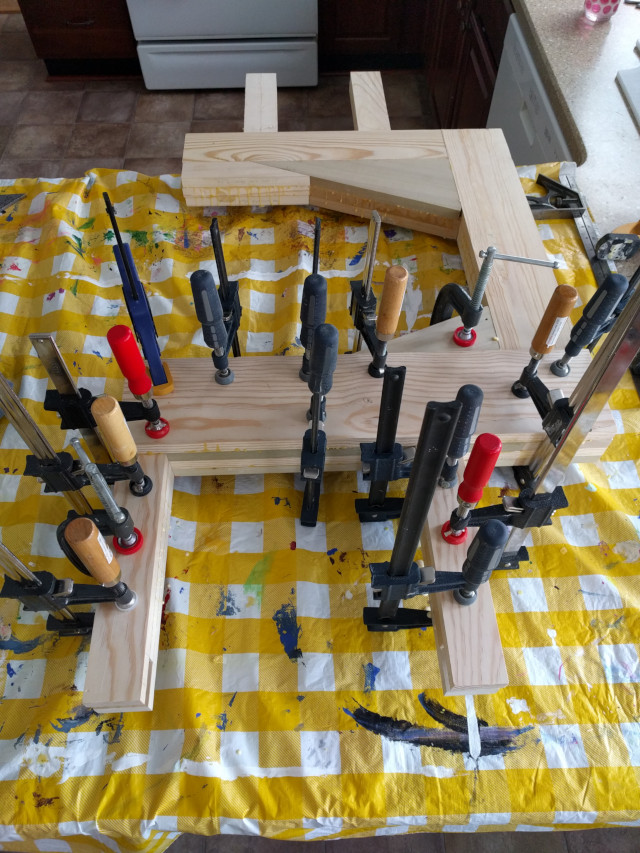
I started this project in the beginning of December when the average ambient temperature in my garage is generally between 40 and 50 degrees F, heading closer to freezing in January-February. Wood glue doesn't dry correctly below 50 degrees, so I did most of my glue-ups on my kitchen counter. My kids thought that building a big bandsaw frame in the family kitchen was cool. My wife did not.
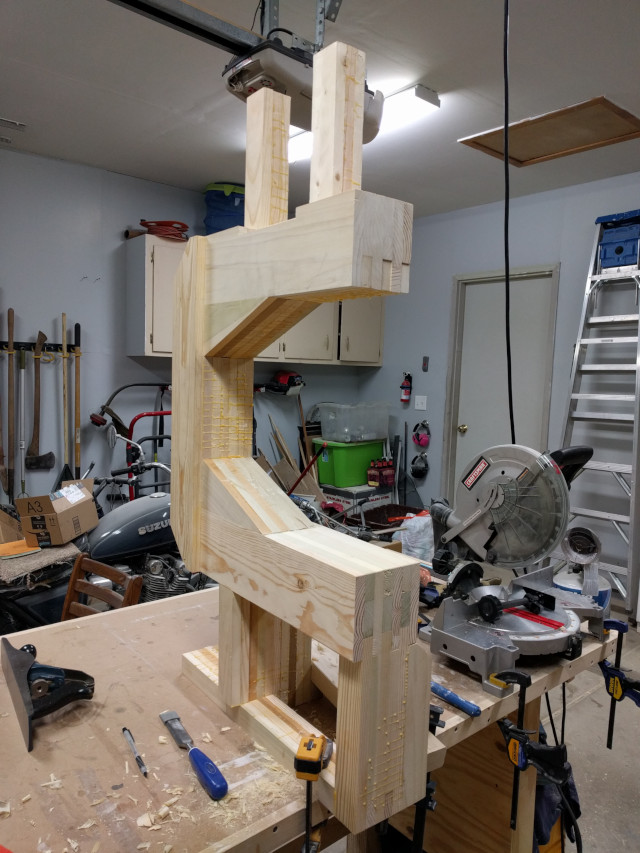
Ah, the completed frame. I use the term "completed" very loosely here since once the frame was done, there were still several hours of cleaning up the glue squeeze-out, planing the various surfaces level, and notching out things here and there. Laborious and tedious but necessary.
The Wheels and Other Mechanical Bits
When it came time to make the wheels, the plans recommend plywood. I didn't have much in the way of suitable plywood but I did have a bunch of leftover MDF. The first thing I tried was laminating some 1/4" plywood to 3/4" MDF to create a three-layer sandwich. This might have worked in theory but I had trouble getting the thin plywood to glue up perfectly flat to the MDF. The reason you have to clamp pieces of wood together when you glue them is that the glue tries to push the pieces apart as it dries. The lesson I learned here is that trying to laminate large thin pieces like this is effectively impossible without building a special jig for it first.
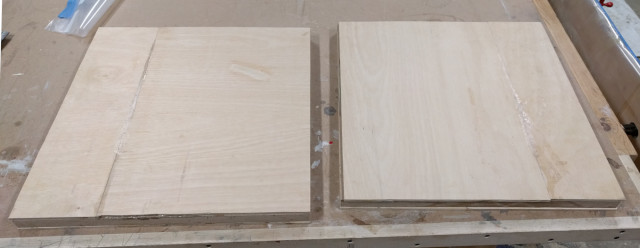
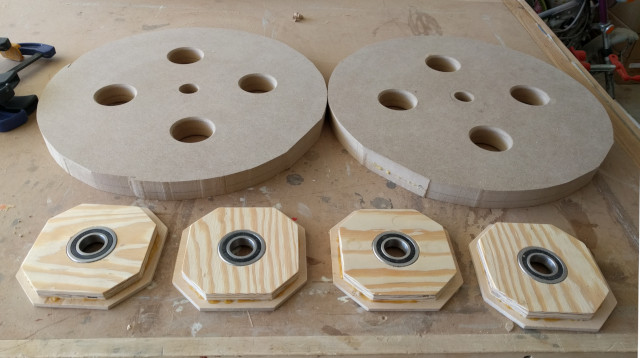
My second attempt was two pieces of MDF of different thickness laminated together. I got the idea to use MDF from Marius Hornberger, and I also lifted his idea of setting the bandsaw tires inside the rim of the wheel. Because they are thicker material, clamping in the middle and around the edges worked a whole lot better for making these wheels. (Although the different sizes means that the glue line is not at the crown of the wheel. Not a big deal, in my opinion.)
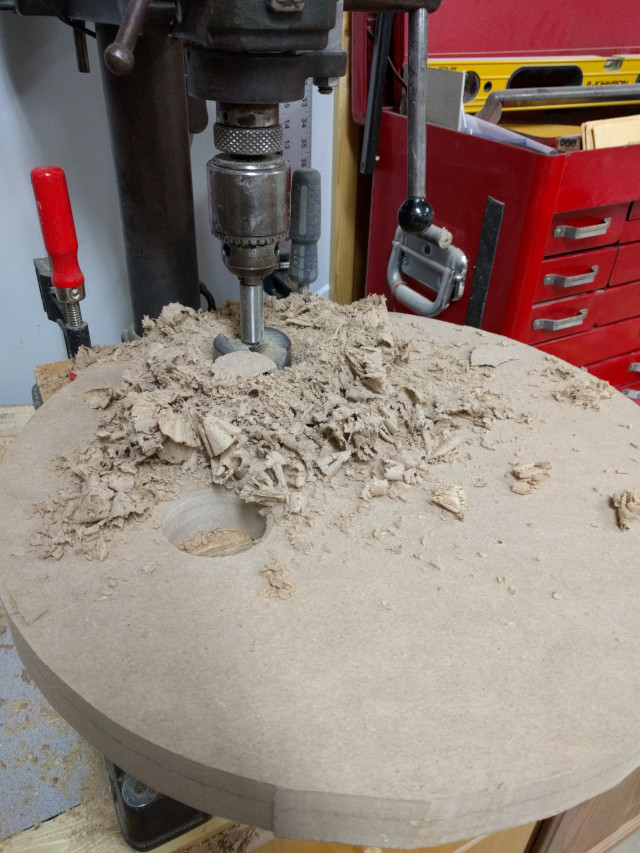
Drilling the finger holes in the MDF wheels with a forstner bit made an ungodly amount of mess.
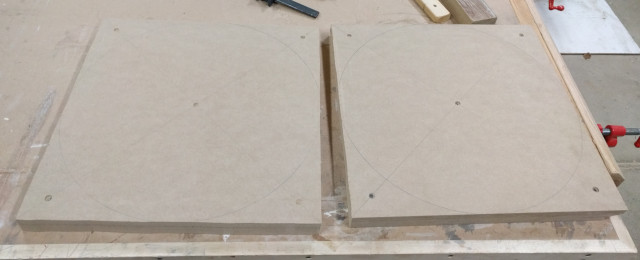
This photo shows that the wheels have been drilled and roughly shaped and the bearing blocks are also done.
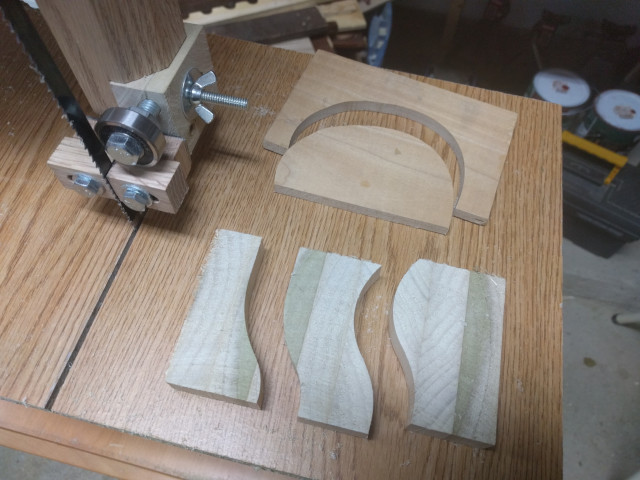
This is how I did the rough shaping of the pulleys. I just took my (ghetto) cross-cut sled and suck a drill bit in it at the right distance from the blade. This is definitely not the traditional way to use a table saw, and there is absolutely the potential to make Bad Things happen if you aren't careful. But this ended up working really darn well.

When it came time to shape the wheels, I should have used the same method on the table saw to get the wheels to the rough size. It would have saved me a ton of time and effort. Getting the wheels true and putting the crown on the rim took forever due to how much material I had to remove and the fact that I didn't really have the right tools for this. A regular chisel doesn't really work for this because it is too small to hang onto when turning the wheels. I ended up taking a tire iron with a large screwdriver-like end and grinding it. This worked okay, mostly, but it wasn't very convenient because the soft metal lost its edge very quickly meaning I had to stop and regrind it every 5 minutes or so.
I got so tired of turning these wheels that I ended up leaving them a little oversized. In theory, this shouldn't matter too much but I realized later that it also meant that I couldn't use standard-sized saw blades. The plans call for a 105" blade so that's what I ordered at first. Unfortunately while the 105" blade would barely fit on the wheels, the upper wheel mount had zero travel and I was worried about putting too much tension on the blade in order to get the tracking right. I stepped the blade size up to 107" which fits perfectly. The downside is that now this thing takes oddball-sized blades. The upside is that I found a place that can make any size blade at reasonable prices. Plus, I don't foresee needing more than a few different kinds of blades anyway. If I change my mind and decide to step down to a more normal bandsaw blade size, it won't be the end of the world to modify the saw for it at some later date.
Now on to wheel mount blocks. The lower one is pretty easy, just a big chunk of wood with a hole drilled into it. The upper one is somewhat complicated, though. Again, not having any existing wood of the proper dimensions, I had to laminate together several sections of poplar board in order to get a nice-size chunk. By the end of this, I had to build my upper wheel mount three times. The first one was ruined because I did something dumb: either made a wrong cut or drilled the hole in the wrong place. The second one was made correctly but broke when my son knocked over the incomplete saw. I salvaged most of that one and produced the final third.

When the saw was knocked over, the wheel mount frame also broke but I was able to glue and screw it back together. Although the mechanism was never designed to take a blow like that, it demonstrated that the weak point of the system is the 1 cm or so of the frame where the wheel mount contacts it. A frame built correctly (and not knocked over by a 4 year-old) should never need this but because mine was already half-broken and I didn't feel like remaking it completely, I ran some screws into this piece from the side to hold it together well enough for normal use.
My bearings and 1" steel rod were sourced from Grainger. Their prices for these kinds of things are very reasonable and if you live near one, you don't have to pay for shipping even though they have to ship these things to the store. There is one right down the street from where I work, so I just saunter on over on my lunch break to pick up orders.
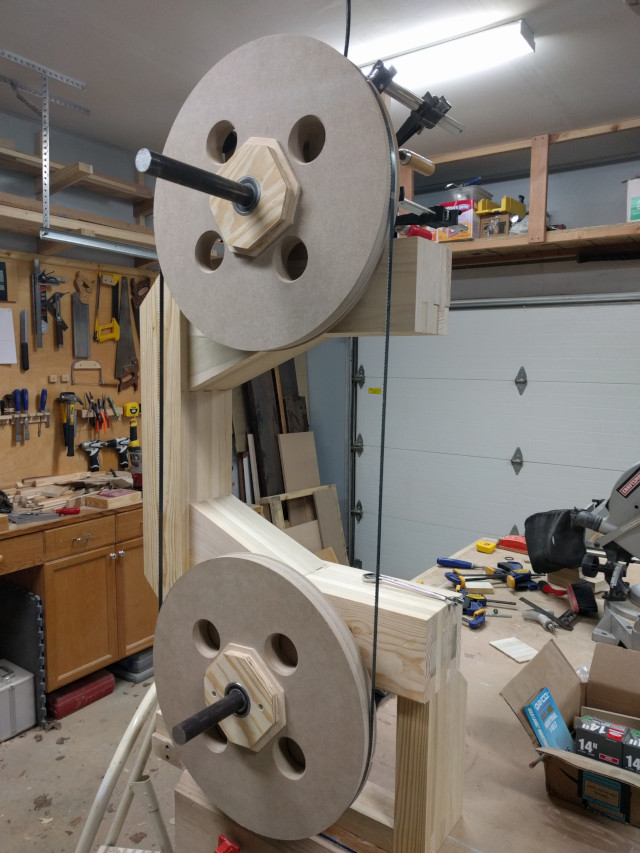
Completed wheel mount block and frame.
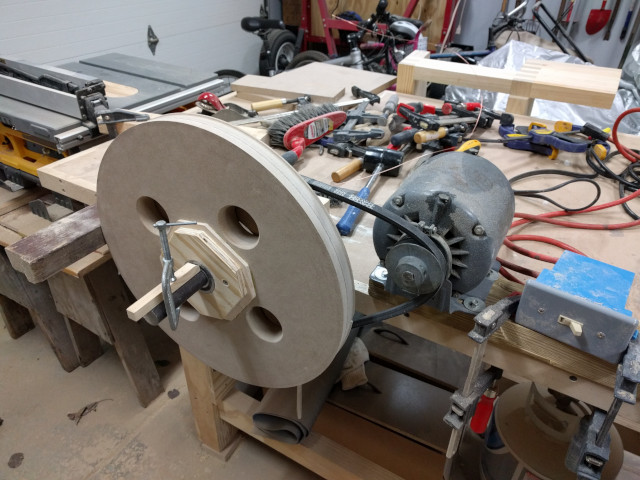
This was my first trial fit of all the main components. Looking pretty okayish.
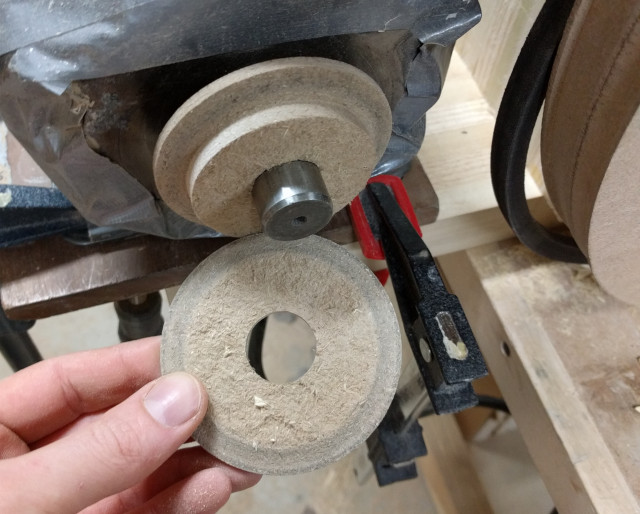
And now, another failed experiment. I didn't have a pulley for the motor that I wanted to use in the bandsaw so I thought I would try to make one from MDF. I mean, the temporary wheel pulley was made out of MDF, why wouldn't it work? I got a nice press-fit onto the motor and covered the holes in the front of the motor to keep it from ingesting all the MDF dust while turning to final size and making the groove for the belt.
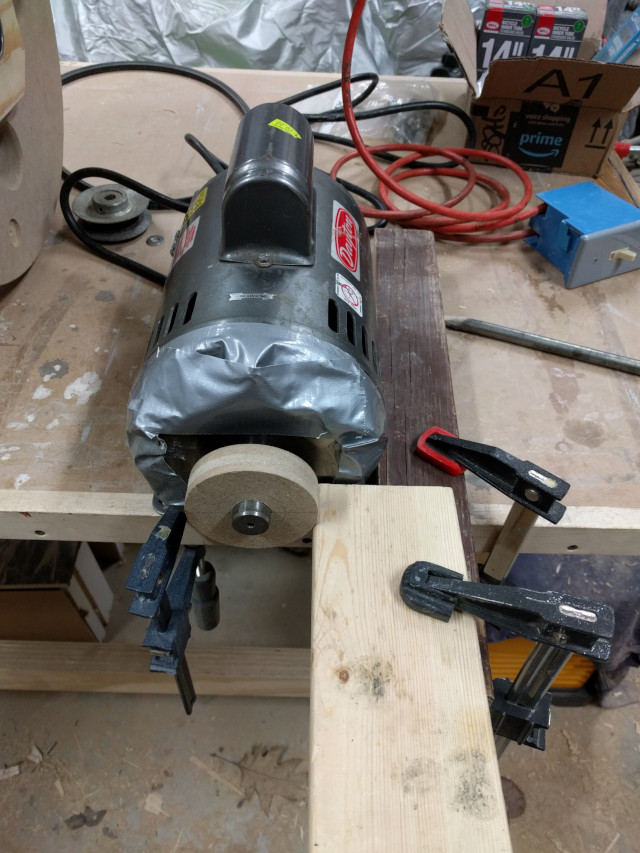
It was all going quite swimmingly until I actually tried to put it to use. After about 15 seconds of running it went... well, I think the technical term is "kerflooey." Clearly MDF on its own is not really the right material for this. It could probably be made to work with the right additional hardware or whatever but I decided to call it a day and just order the right pulley.
This is the first iteration of the bandsaw in a working state. Clearly visible is the temporary table and a complete lack of any safety whatsoever.
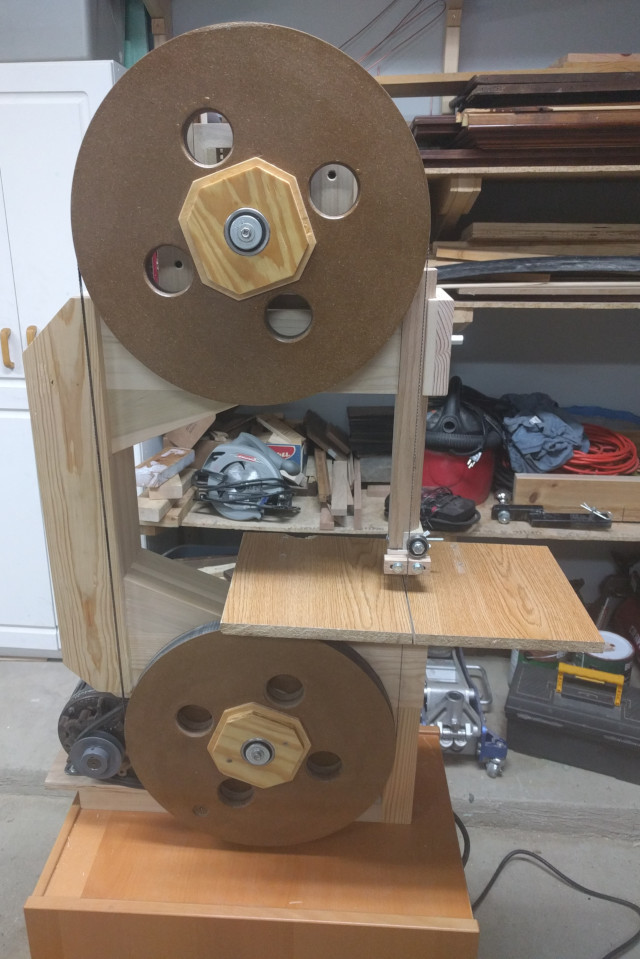
First cuts!
Finishing it Up
The rest of the saw progressed rather slowly throughout the spring and summer due to other obligations but over time I finished the table, trunions, enclosure bits, knobs, and so forth.
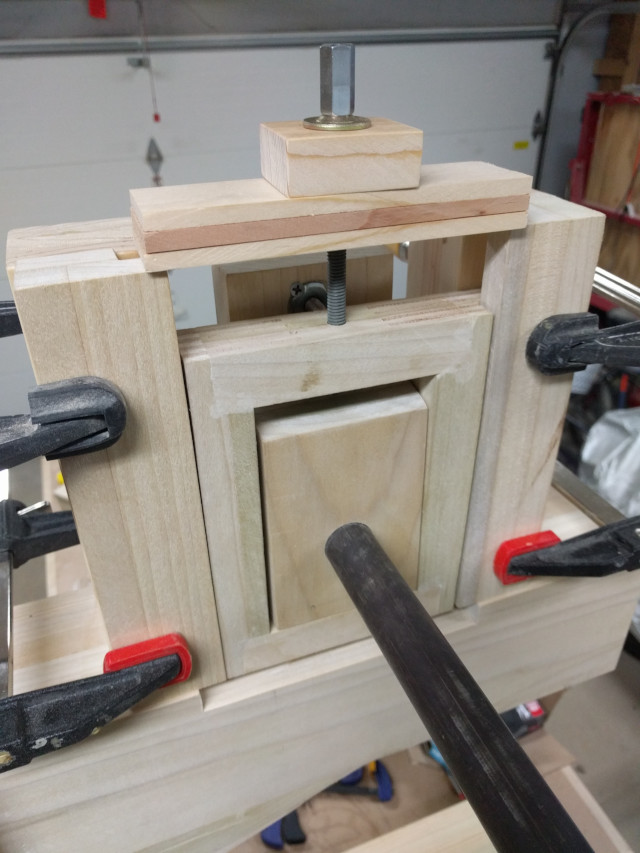
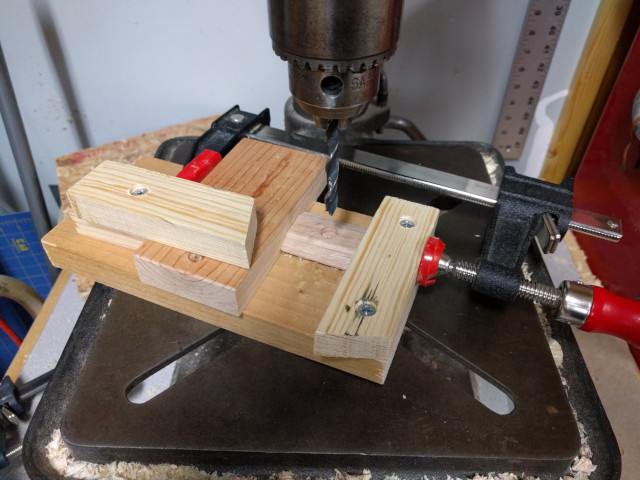
Check out my hacked-together drill press vise! It actually worked reasonably well.
These are going to be the trunion locking knobs. I don't like these that much. If you're considering building this bandsaw, buy or build triangular or star-shaped knobs. The wings on these come very close to interfering with the other stuff under the table. I'll make better knobs someday.
Building the upper enclosure. you can see that in an attempt to be a complete cheap-ass, I've again glued together several pieces of scrap to make boards.
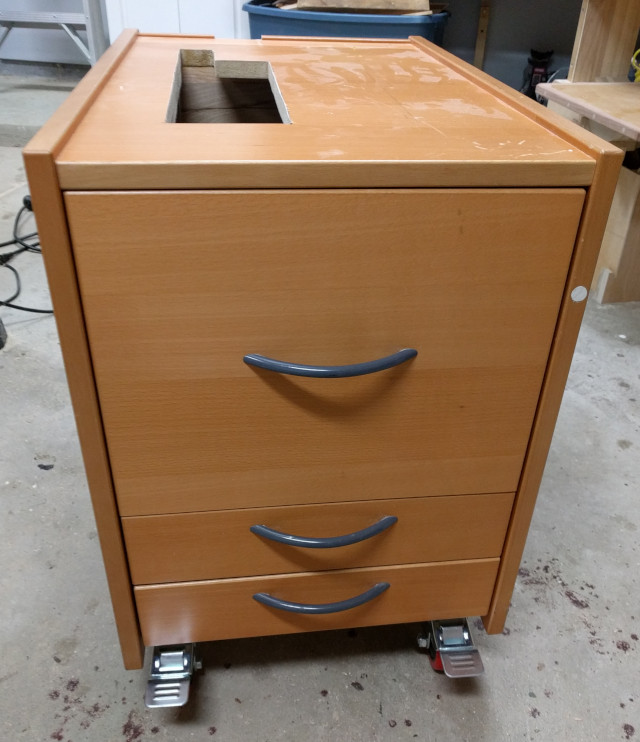
The stand for my band saw is a set of desk drawers that I picked from the garbage. It is quite sturdy. I'm still not sure why they were thrown out, as far as I can tell, nothing was wrong with them and there were no body parts inside. Aside from putting a large hole in the top, the other modification I made was to relocate the large drawer to the upper part of the cabinet so that it could be my sawdust-catching drawer. This took a fair amount of swearing but eventually I made it work. I also put beefier casters on it with locking wheels in the front.
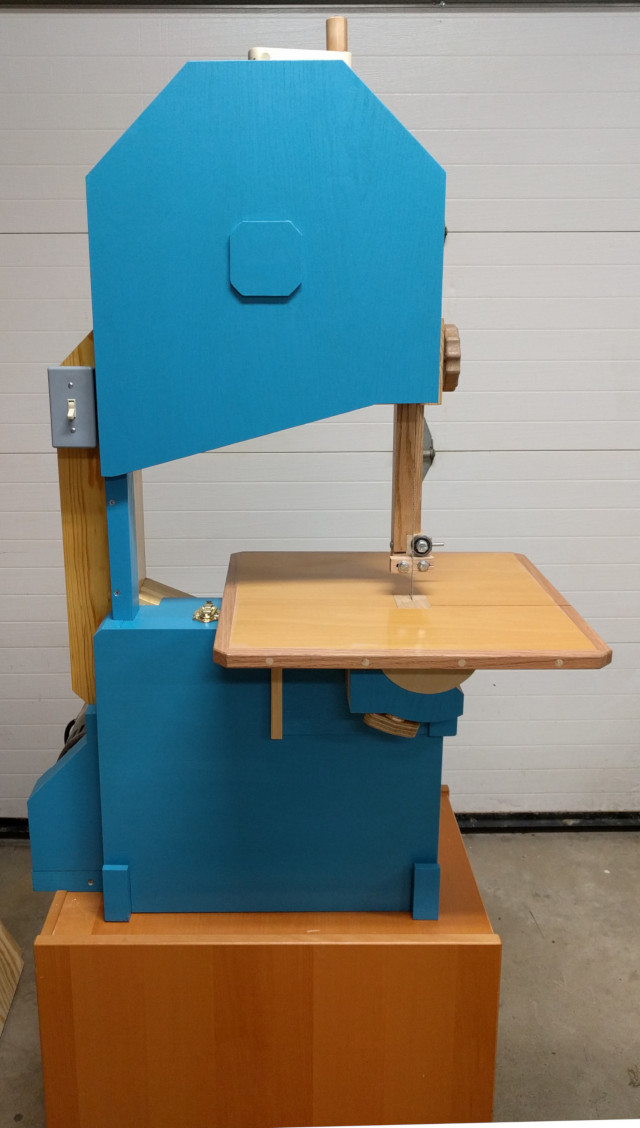
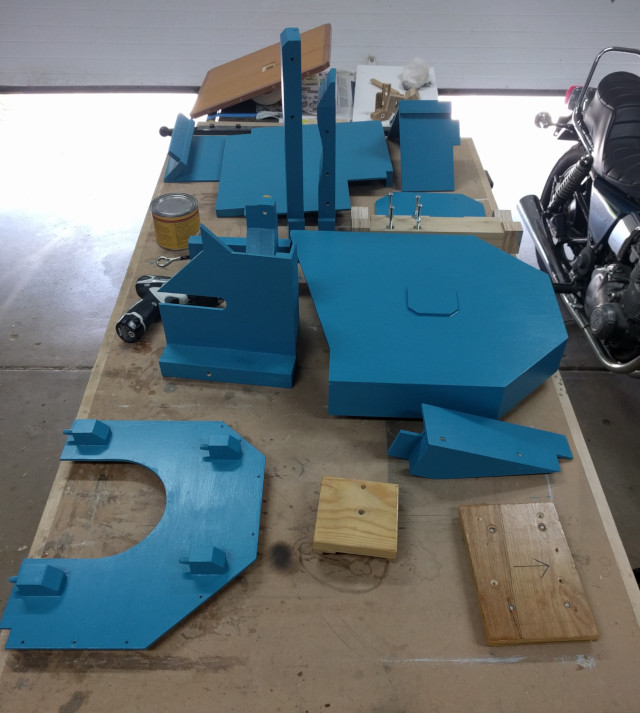
Painting and finishing the final bits. My daughter picked out the color so if you don't like it, go fornicate your hat.
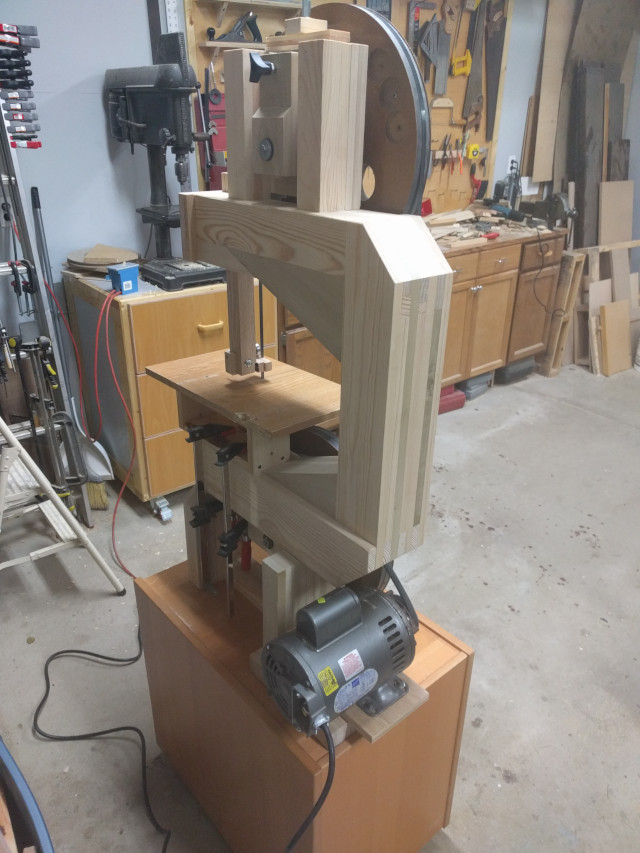
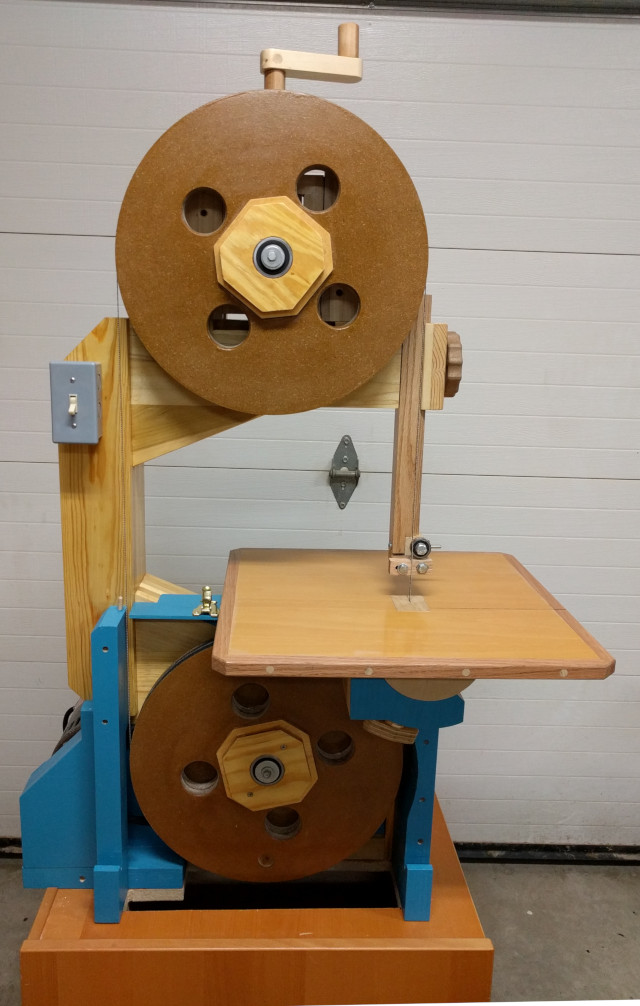
The completed saw! The only things left to do at this point are a blade guard and to make the blade guide out of better material. I have since ordered some exotic hardwood for this but have a few other ideas as well. We'll see.
Open kimono! To my surprise, there was very little in the way of adjustment or fine-tuning needed once it was all put together. If you're checking things as you go along, the whole saw just works great once it's all put together. I think this is a credit to Matthias' design.
And finally, the motor and wiring:

There are only two things left to do on this saw, I'll get to them as time and motivation allow:
- Install a blade guard in front of the blade on the adjustable arm.
- Remake the blade guides out of harder wood and maybe experiment with other materials.
Lessons learned:
- Trying to laminate large pieces of thin plywood is a fool's errand.
- Pulling staples from old bed slats sucks.
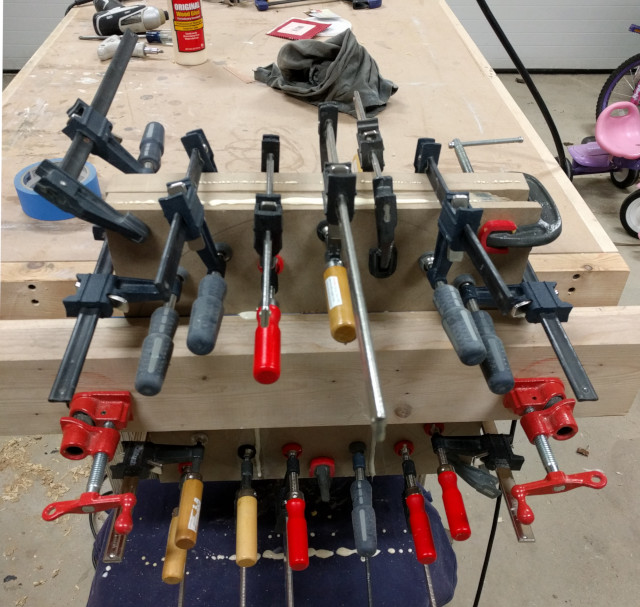
- There is no such thing as having too many clamps.
- Verify your measurement tools when you buy them.
- I need a bigger tablesaw.
- Don't leave the frame standing upright anywhere a youngster might be able to tip it over.
- Small MDF drive pulleys don't work.
- Never wait five months after a project is done to start writing about it or you forget lots of important details and amusing anecdotes.