I have accumulated quite a lot of sockets over the years. Some were purchased as a set, some were given to me by my father (a former auto mechanic) from his extensive collection. A few just turned up out of nowhere unexpectedly. I looked for a long time (years, in fact) for a sane way to organize them. Basically if I wanted to pay money, these are all of my options:

Tool drawer organizers. There are lots of options for these, most are either foam or plastic. They are intended to fit into a drawer and have a spot for every socket and maybe some accessories. They make your socket drawer look pretty but the disadvantage is that you have to constantly go back and forth between your work and the tool box every time you need a different socket. Or, more likely, trying to find the right size. It's maddening and frankly I'm done with it. I want to bring my sockets to where I'm working, quite often under a car.
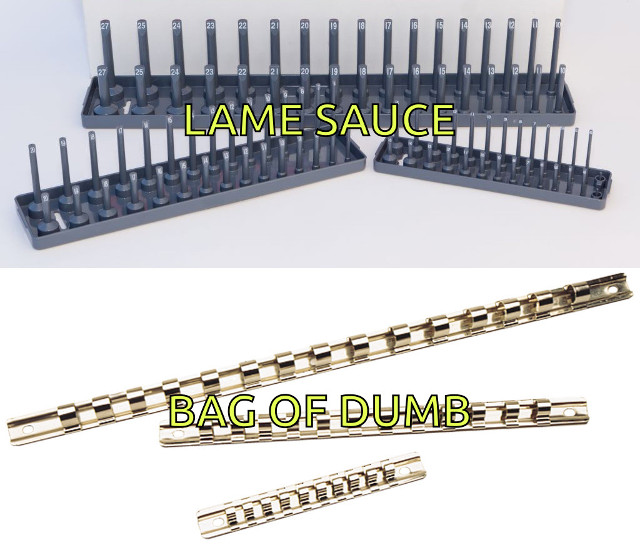
Socket caddies and bars. These come in two major forms, the plastic spoke trays and and clip-on bars. These are portable, but they're awkward. They only hold sockets, usually, and you still need to think carefully about what you're going to need or else you'll end up making additional trips to the tool box. The plastic versions of these are both expensive for what they are and cheaply made. I tried the clip-on bars in the past and always hated them for various reasons.

Buy a socket set that comes with its own case. Of these three poor options, this is actually the most rational. However, if you already have a full set of sockets and ratchets, then you're basically over-paying for a case. And the main catch here is that it's hard to find a good socket set that also comes with a well-made durable case instead of some cruddy blow-molded thing. Out of the gate, this is a non-starter for me anyway since many of my sockets and ratchets have sentimental value and I'm not going to throw them out just because I'm semi-OCD.
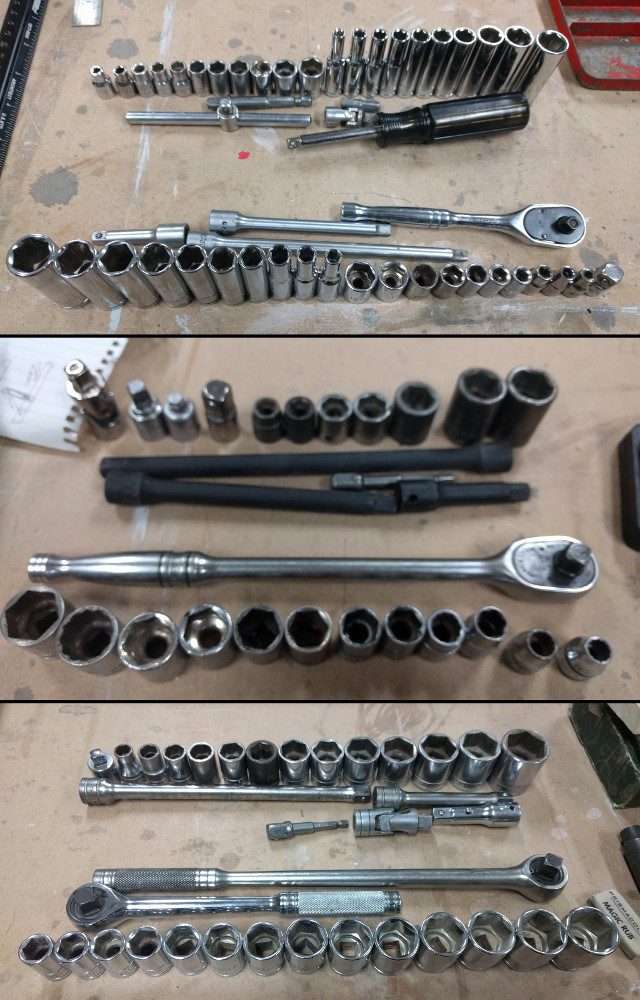
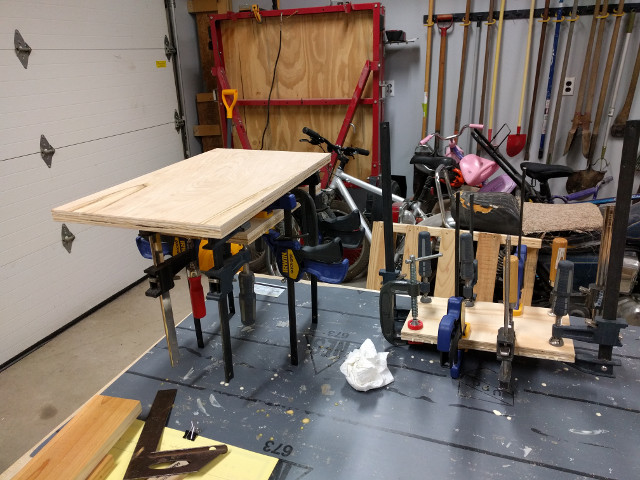
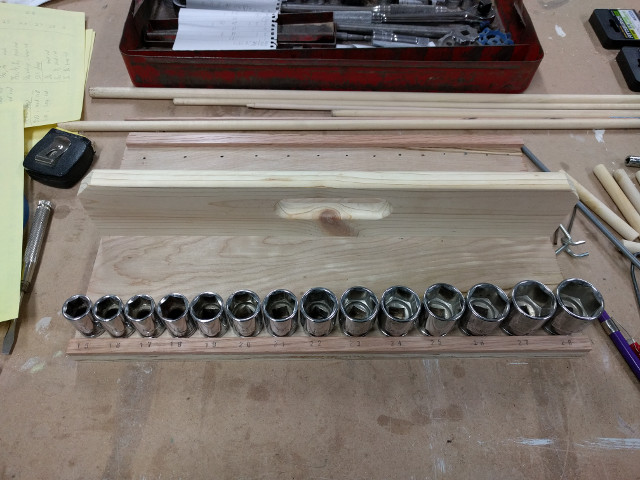
So then. Can't buy a decent socket organizational solution, what's next? Build one! I laid out my sockets on my work bench to get an idea for how much space each set would take up and played around with a few different layouts. For quite a while I struggled with coming up with a simple design that met all these criteria:
- Each socket in its own place for quick identification.
- Bonus points if each socket can be labeled.
- Ratchets and accessories stored with the sockets so that I can just grab one tray and start working.
- Must be easily portable and must be able to be carried with one hand.
- Stackable to make efficient use of drawer space.
- Simple to build with relatively few tools. (I am not an advanced wood worker. Yet.)
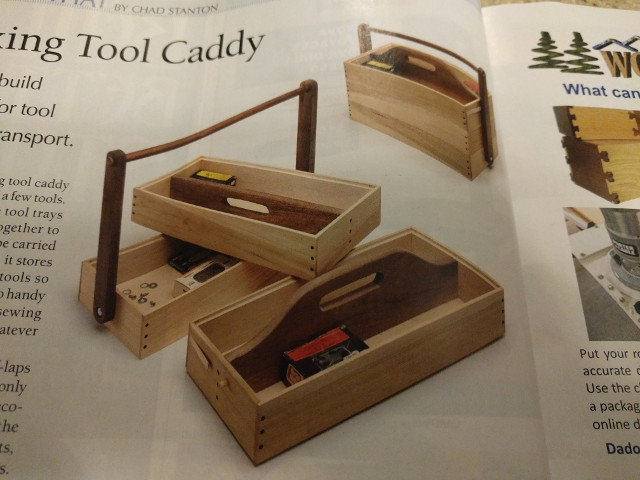
While I had all of this brewing in the back of my mind, I happened to be visiting my in-laws and ran across this project in a wood-working magazine. This was just about exactly what I was looking for.
Now that I had a decent design in mind, I laid out all of the sockets a second time to get an idea for how much space each tray would take up. I drew up some rough sketches of the trays and settled on dimensions. It didn't make sense to make them all the same size, so the "stackable" part didn't quite pan out exactly as I had hoped. Still, some of them are close enough in size that they technically do stack.
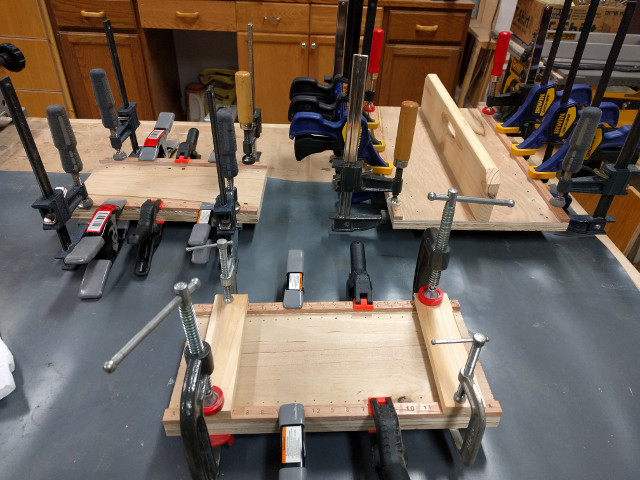
I tried to make these all out of scrap materials. The only scrap plywood I had in abundance was 5/16" 3-ply sheathing. In other words, pretty crappy stuff. I also had quite a bit of 1/4" plywood with a decent-looking veneer on one side so I cut everything to size and then laminated the two plywoods together with glue and clamps. One lesson learned: on one of the bigger pieces, I foolishly skipped clamping the middle, thinking that having clamps just around the edges would work fine. Nope. The glue pushed the middle up and caused a significant bow. It wasn't too noticeable visually but would cause a problem attaching the handle later on.
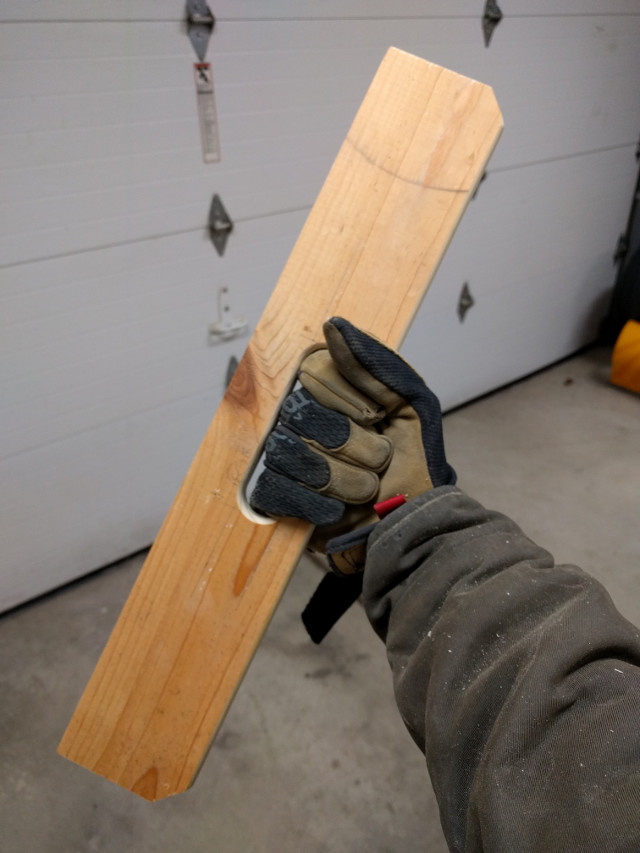
Figuring out the hole size for the handle. The main goal here was being able to fit my fingers through comfortably with gloves on.
The hole was made by laying it out with a ruler and compass, drilling out each end with a 1" Forstner bit, and then cutting out the waste between the holes with a jig saw. Since my jig saw sucks, I had to clean up each and every one with a file and then I routed the whole thing with a roundover bit.
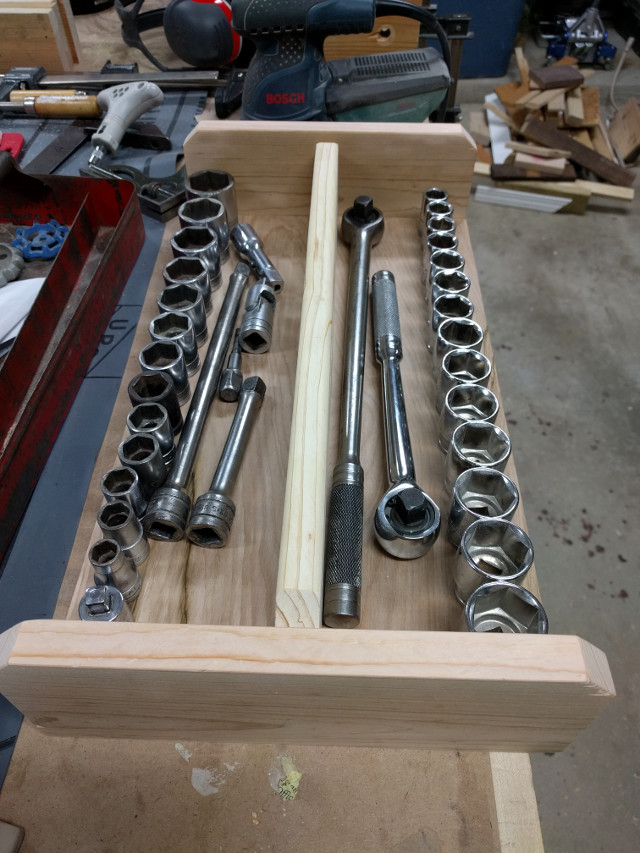
This shows the first "test fit" of the 1/2" socket tray. Everything fits swimmingly.
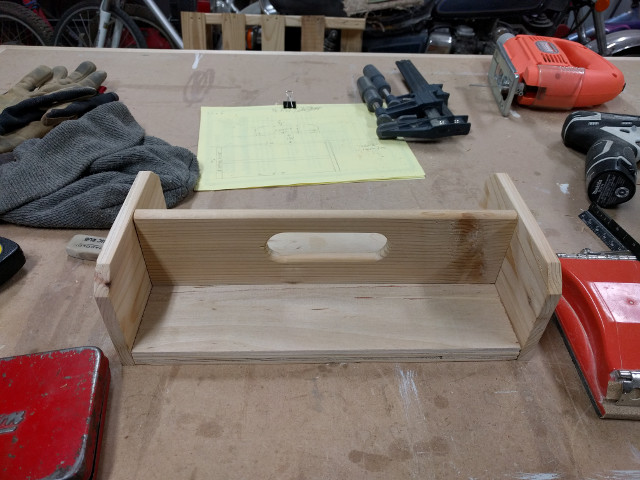
This shows the test fit for the 1/4" tray. The handle and sides were made out of cedar scraps, of all things. Cedar is very soft but seems like it will work just fine. If not, it's easy to replace with something more stout later.
The next step was figuring out exactly where each dowel or rod would go. For the larger sockets, I could arrange them exactly where I wanted them to be and jab a marker or pencil down the middle to mark the wood. But the 1/4" sockets were too small for this to work so I used an algorithmic approach: I found the width of the smallest and largest of each row of sockets and then marked off an even number of spots along a line between the two. This ended up not being perfect, but certainly close enough.
To label the sockets, I cut strips of oak into 1/4"-thick pieces and stamped the size of each socket using steel number punches. Lots of trial and error here to get a decent-looking result. I tried various methods of covering the numbers with different kinds of paint and then wiping or sanding the excess off. I tried markers, pens, and pencils. Finally the thing that worked best was getting the oak as smooth as possible (lots of sanding with fine-grit paper) and then just filling in all of the numbers with a small-diameter mechanical pencil. It doesn't look terrific, but it will do. A coat of poly on top should keep them readable for a long time.
Gluing the number trim pieces into place. I believe I used construction adhesive to make cleaning up a lot easier. Dealing with dried wood glue here would have been a massive pain.
Polyurethane applied. I only used one coat. It probably should have had at least one more but I was itching to get these done and don't think another would have made a huge difference in the long run. I can still go back and do some light sanding and use some rattle-can poly later.
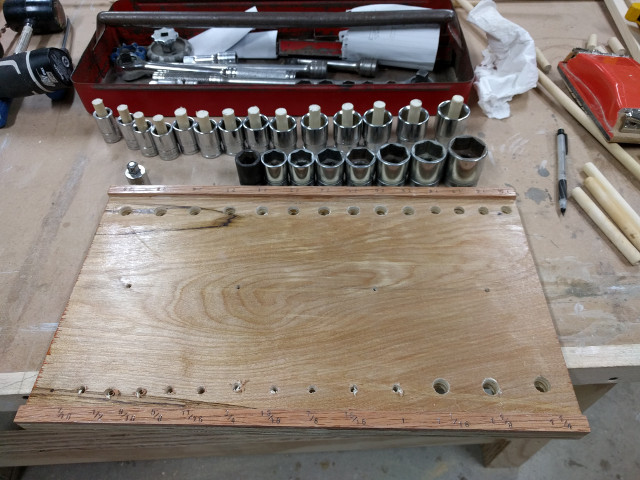
Here I just finished drilling holes for the dowels on the 3/8" tray. I used dowels here and on the 1/2" tray and used metal rods for the 1/4" tray. Each dowel is just long enough to reach the top of the socket. This should keep them from jumping right off whenever the tray is bumped. I messed up a couple holes either by drilling them too large or off-center and had to fill them up and redo them.
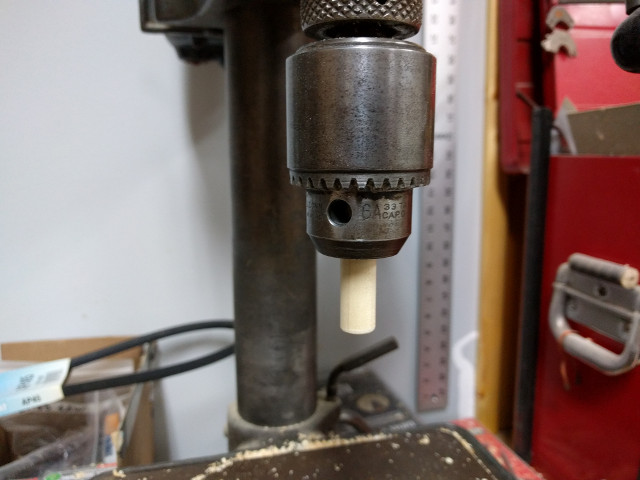
I flattened and rounded off each peg (both wood and metal) in the drill press with the aide of sand paper and files. This was extremely boring and tedious.
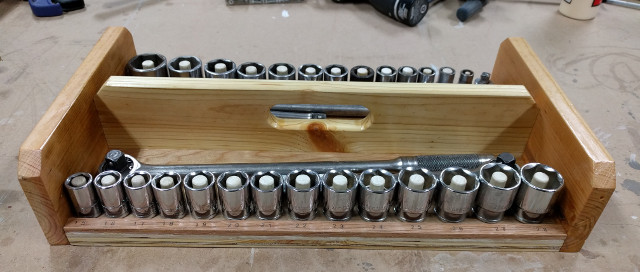
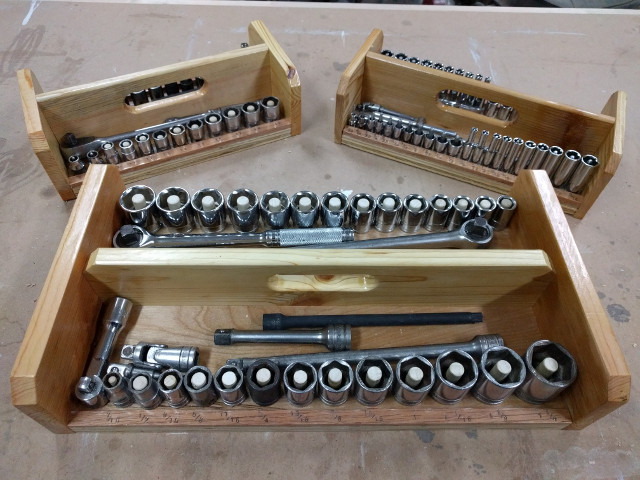
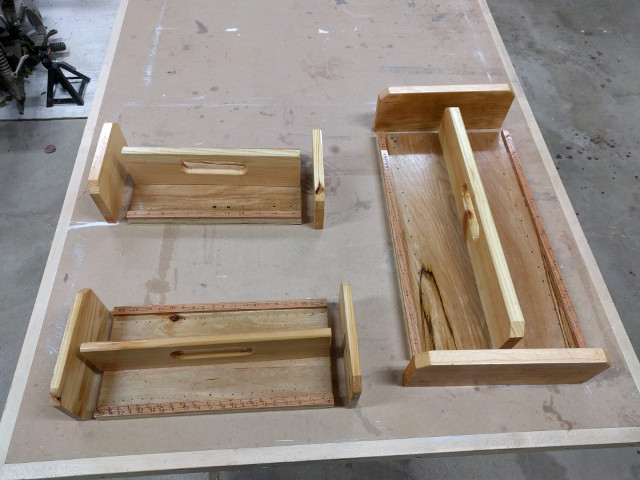
The finished contraption! Here is the 1/2" tray.
Fit and finish could be loads better but they are plenty functional and easy to carry around and store, which is exactly what I want.
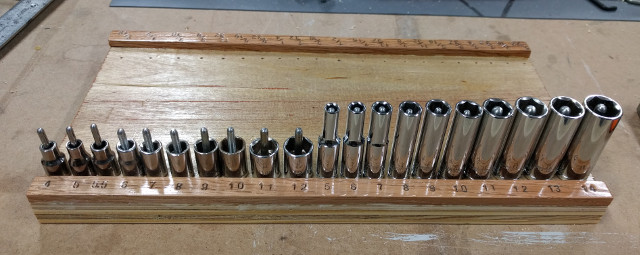
The 1/4" tray in progress. I put the regular and deep sockets all on the same tray.
All three again. I'm very pleased with how these turned out, even if they're slightly on the ugly side. The only one not pictured here is the one for the 1/2" deep sockets. That's because I somehow messed up the dimensions and have to do it all over again. It will be easier to make since there won't be any pegs, the sockets will just lay flat. I haven't decided yet whether or not to add spacers to keep them from rolling around but probably won't.
Anyway, I know these things will save me heaps of time and heartache over time.